Wednesday, August 19, 2015

Orange Maple Roasted Sweet Potato Salad

Did you read that title?!?! As if orange maple dressing wasn't enough, then adding roasted sweet potatoes in too?? Heaven in a jar! I will say though, you have to like the sweet/savory meal, because this salad is on the sweeter side. But it is sooo good! And as usual, super easy! Spend an hour or so on the weekend making all 5 lunches for the week and you're good to go!

The quantities listed below are enough for 5 pint sized mason jars. If you are making more or less salads, adjust the quantities as necessary.

Completed Mason Jars

Ingredients for Dressing:
1/2 cup fresh squeezed orange juice
1.5 Tbsp olive oil
1 Tbsp pure maple syrup
1 tsp ground cinnamon

Ingredients for Salad:
1 cup quinoa, uncooked
1 large sweet potato, cut into 1/2 inch squares (I left the peel on)
1/2 cup walnuts, chopped
1 medium apple, chopped
1/4 cup dried cranberries
1/4 cup red grapes, cut in half
4 oz goat cheese, crumbled
2-4 cups kale or choice of greens (enough to fill jars)

1. Preheat oven to 375 deg F.
2. Spread the sweet potato chunks on a baking sheet in a single layer. Drizzle extra virgin olive oil over them and roll around to coat. If desired, season with salt and pepper.
3. Cook in the oven for approximately 30 minutes or until sweet potatoes are cooked thoroughly and slightly crispy on the outside.
4. Cook the quinoa according to package instructions.
5. Mix together all dressing ingredients in a bowl. Add the dressing evenly to each of the 5 mason jars.
6. Add the ingredients evenly to the mason jars in the following order (bottom to top): apples, sweet potato, grapes, cranberries, goat cheese, quinoa, walnuts, greens.
7. Shake, dump, and ENJOY!

You can then add whatever type of protein on top that you prefer or eat it just as is. Pumpkin seeds, chicken, or a sweet chicken sausage would all pair well with this salad!

With no protein added, one serving is 330 calories, 48g of carbs (thank you quinoa!), 13g of fat, 8g of protein, 74g of sodium, and 18g of sugar.

Like I said, this one is a winner!! If you try it out, let us know how awesome you think it is!!

Ready To Devour!!!


Friday, July 31, 2015

Hawaiian Cauliflower Crust Pizza

Are you a pizza lover like me who still wants to eat clean?! If so, are you constantly dreaming about eating a nice, hot, cheesy pizza? It doesn't quite fit into the clean eating lifestyle, does it?! It does NOW! Keep reading....I will warn you, this is quite time consuming to make versus popping a frozen pizza in the oven, but the result and healthiness is SO worth it.

Ingredients for pizza crust:
1 medium sized head of cauliflower, washed and dried (about 4-5 cups of cauliflower "rice")
1/4 teaspoon salt
1/2 teaspoon crushed dried basil
1/2 teaspoon crushed dried oregano
1 teaspoon garlic powder
dash of crushed red pepper
1/4 cup shredded Parmesan cheese
1/4 cup mozzarella cheese
1 egg
Parchment paper

Ingredients for pizza:
4oz sliced ham, cut into 1/2 squares (I just used low sodium deli meat)
1/2 cup cubed pineapple
1/4 cup pizza sauce (low sodium!)
1/2 cup shredded cheese of your choice (I used cheddar and mozzarella)

Directions for crust:
1. Preheat oven to 450 degrees and place pizza stone or baking sheet in oven.
2. Place a large piece of parchment paper on counter or cutting board and spray with nonstick cooking oil.
3. Cut off the florets from the cauliflower head and place in food processor. Pulse for approximately 30 seconds, until the cauliflower is fully ground (should have the consistency of snow).
4. Place the cauliflower snow into a microwave safe bowl and cover. Microwave for 4 minutes.
5. Put cooked cauliflower onto a thin towel and let cool.
6. Wrap up the towel and squeeze out as much water from the cauliflower as possible. Take your time on this step as leaving too much water will make the crust crumbly. If you can get out enough water, you will be able to eat the pizza with your hands like normal! Otherwise, you'll be forced to use a fork to enjoy (but the taste is still there)!
7. Put the dry cauliflower into a medium bowl and add Parmesan cheese, mozzarella cheese, salt, basil, oregano, garlic powder, red pepper, and egg. Mix thoroughly. It's easier to use your hands at this step to mix, especially since you're going to have to get them dirty anyways on step 8!
8. Form the dough into a pizza shaped crust on parchment paper. Firmly press down to keep it tightly formed. 
Pizza crust before baking
9. Carefully slide the parchment paper onto the hot pizza stone or baking sheet in the oven. Bake for 8-11 minutes or until lightly brown on top.
10. Remove from oven and add pizza sauce, toppings, and cheese. Put back in oven for another 5-7 minutes or until cheese is bubbly and browned on top.
Pizza with toppings before baking
11. Remove from oven and allow to cool for a few minutes. Slice up and enjoy!

Time to Enjoy!!!

Finished Pizza!


Nutritional Info:
1/2 pizza: 344 calories, 20g carbs, 16.5g fat, 31g protein, 1,240mg sodium (ouch!!), 10g sugar

Thursday, July 23, 2015

Honey Mustard Chicken Mason Jar Salad

Another AMAZING one!!! I've had this for 3 days now and each day, I'm counting down the minutes/hours until lunch time. It fills me up, but still leaves me wanting more because it is so good! This is a very slightly modified recipe from Autumn Calabrese's new cookbook Fixate!

The amounts listed below will make 4 - 16oz mason jar salads. If you are making more or less, adjust the quantities as necessary.

Finished Product!
Ingredients in Honey Mustard Dressing:

1/4 cup reduced fat (2%) plain Greek yogurt
1.5 Tbsp Dijon mustard
2 Tbsp raw honey
1.5 Tbsp rice vinegar
1/8 cup extra virgin olive oil

Ingredients in Salad:

3 cups chopped chicken (I used grilled boneless, skinless, chicken breasts)
1/2 cup chopped green apple
1/2 cup seedless red grapes, halved
1/3 cup sliced raw almonds (I chopped up whole almonds)
1 oz raisins
2 sliced green onions
2 Tbsp chopped fresh tarragon (I left this out)
8 cup shredded romaine lettuce (or your greens of choice)

To make the dressing, combine the yogurt, mustard, honey, and vinegar in a bowl and mix well. Slowly add the olive oil and whisk until blended. Add salt to taste (I didn't add any). Add the dressing evenly to the bottom of the four mason jars.

Next, add the following ingredients, in order to form the salad: Chicken, green apple, grapes, raisins, onions, lettuce, and almonds. Stuff the lettuce in there so that each jar is completely full.

You can also add other fruits, such as mandarin oranges or blueberries. And celery would be good as well. The celery could go at the bottom because it is a harder vegetable. The oranges should go in between the apple and grapes (away from the lettuce since they will cause wilting) and blueberries can go on top of the grapes. You can also substitute other nuts on top.

Then store these in the fridge for up to 5 days. When you're ready to enjoy, just take one out. The dressing is thicker, so it doesn't mix up when you shake the mason jar. Dump the contents into a bowl and stir to get the dressing to coat all of the lettuce. Have I mentioned this salad is so so tasty?? I can't wait to eat more tomorrow for lunch!

YUM!!!!!
Nutritional Facts (each):
Calories: 437 Carbs: 31g Fat: 19g Protein: 38g Sodium: 351mg Sugar: 21g Fiber: 4g

Wednesday, July 15, 2015

Homemade Chocolate Peanut Butter Protein Bars

Get ready for the easiest protein bar recipe ever! And these are so yummy! They make the perfect pre or post workout snack or eat them as a pick me up when you need just a little boost.

This recipe makes 14 bars in an 8x8 pan. Adjust the quantity of ingredients if you want more or less.


Ingredients:
1/4 cup fresh ground peanut butter (can also use natural peanut butter)
10 Tbsp PB2 powder
10 Tbsp water, divided
1 1/2 cups chocolate whey protein powder (I used Extreme Milk Chocolate from Optimum Nutrition)
1 cup uncooked old fashioned oats
5 Tbsp honey

Directions:
Mix the PB2 and 5 tablespoons of water together in a small bowl. It will be thick, but do not add extra water. Combine the fresh ground peanut butter, PB2 peanut butter, and honey together in a bowl. Heat in the microwave for 20 seconds. Add in the protein powder, oats, and remaining water. Stir together. The mixture should be thick, but slightly moist.

Press the mixture into an 8x8 tray lined with parchment paper. You will need to press down rather hard so the bars stay together when they're done. Refrigerate for at least 1 hour, then cut into 14 equal bars. I then wrapped each one in a small piece of parchment paper and put them in ziploc bags (7 in each). You can also put them into individual plastic baggies so you can grab them and enjoy on the go! Keep them refrigerated. I'm not sure how long they'll keep, but I would guess you'll eat them too fast anyways!

A few adaptations that I will be experimenting with:

-The bars are very sticky, I'm guessing because of the honey. The next time I make these, I am going to use a mixture of agave and honey to see how the consistency is.
-You can use a full cup of fresh ground peanut butter instead of mixing in the PB2 and 5T water. I did this to reduce the amount of fat in the bars and I don't notice a difference in taste.
-These would be good with add ins such as chopped up nuts, pumpkin seeds, raisins, or other chopped dried fruit. You may need to play with the amount of water to achieve the same consistency.
-Feel free to use other flavors of protein powder, such as vanilla or cookies and cream. One idea is to use the PB2 with cocoa powder and vanilla protein powder. It wouldn't be as chocolaty, but I bet it would taste great!

Nutrition facts for ONE serving:
Calories: 131
Carbs: 13g
Fat: 4g
Protein: 14g
Sodium: 89g
Sugar: 5g
Fiber 3g

Tastes great and is that healthy?! Yes please!! This one is a keeper for sure!

Thursday, July 2, 2015

Creamy Garlic Mason Jar Salad

Woohoo! Time for another mason jar salad recipe! This is a good one too!

 The "guts" are basically the same as the microgreen salad that I previously posted, but the dressing and surprise at the bottom is where the true yummyness lies!

Confession, I have never actually tried to "make" an artichoke. Growing up, I would eat the leaves with my mom. As I've gotten older, I love artichoke hearts on a salad or from a salad bar. But, I've never taken the plunge to prepare one at home. Until now. During my latest trip to Fresh Field farms, I saw the artichokes and thought, yes please! So yes, the artichoke hearts make this salad even more amazing. I believe you can buy them in a can as well, but I don't know about sodium content or taste. Proceed at your own risk!

Ingredients for dressing:

1/4C extra virgin olive oil
1/8C apple cider vinegar (I was out, so I used mostly red wine vinegar with a splash of balsamic)
2 cloves garlic, chopped
1.5T fresh lemon juice
1T chopped parsley
1/2tsp Dijon mustard
1/2T pure maple syrup (you can also use raw honey)

Ingredients for salad:

1 medium carrot, shredded (I cut into matchstick sized pieces)
1 large cucumber, chopped
1-2 medium red bell peppers, chopped (you can use any color)
20-25 cherry tomatoes (you can also use a whole tomato, but the cherry ones stay fresher)
1-2 fresh artichokes (again, you can use canned hearts...I think!)
Lemon Juice (to use while preparing the artichoke hearts)
3-4C chopped napa cabbage
3-4C romaine (or your favorite salad greens)

Now for the easy part. Mix all of the dressing ingredients together and blend in a food processor. I didn't have one, so I whisked all of the ingredients together, let it sit in the fridge for about an hour, and then strained some of the garlic out (not all of it).

To prepare the artichoke, take all of the tough outer green leaves off. If you like to eat the meat off of the leaves, save them. You can blanch them all together. Otherwise, you can throw the leaves away. Trim off all of the outer green skin at the base of the artichoke and the stem. Rub lemon juice on the exposed artichoke. This will slow the browning process. Cut the remaining artichoke in half. Use a spoon (or melon baller if you have one) to scoop out all of the choke (the hairy "stuff"). Drop the remaining parts of the artichoke in boiling water for about 3-5 minutes. If you want to eat the leaves, add them to the boiling water. You can dip the leaves in lemon juice, any prepared dressing, or just eat them plain! Remove the artichoke from the boiling water and let dry/cool. Once they have cooled off, chop them up for the salad.

To make the salad, just layer the parts in the following order. Make sure the artichoke hearts are on the bottom to allow them to marinate in the dressing. Delish!! Then add: carrots, cucumbers, bell peppers, cherry tomatoes, and finally the greens (mixed together). Stuff as much greens in the mason jars as will fit. You want it to be tight!

Store in the fridge for up to 5 days. When you're ready to eat, just shake, dump, and enjoy! You can top the salad with any protein as well. My go to right now is roasted raw pumpkin seeds. Grilled chicken would be great too.

Ready to EAT!


Monday, June 29, 2015

Ultimate Reset Reflections!

Have you heard of the Ultimate Reset? What is it? It is a program designed to return your body to it's optimal health. The first week is all about reclaiming your body, then releasing harmful toxins in week two, and finally, restoring your system to it's maximum health. It's not a typical cleanse...I never had to run to the bathroom or starve myself.

I finalized my plan to do the Ultimate Reset (UR) about a month before I actually started. You are not supposed to do intense workouts while doing the program, and therefore, I had to carefully plan the UR when I didn't have a race already scheduled. Before the program started, I read the entire book that comes with the package. I planned out all of my meals for week one. I wrote down an approximate schedule for when to take the supplements and when to eat my meals/snacks. And most importantly, I went shopping!

A lot of the ingredients were new to me. Miso paste, bok choy, Braggs Liquid Aminos, tahini paste, raw pumpkin seeds, etc. In addition, several of the ingredients weren't sold at my local grocery store (Publix), so I had to take trips to specialty stores. But, on Day 1, I had all of the ingredients and I was ready to go!

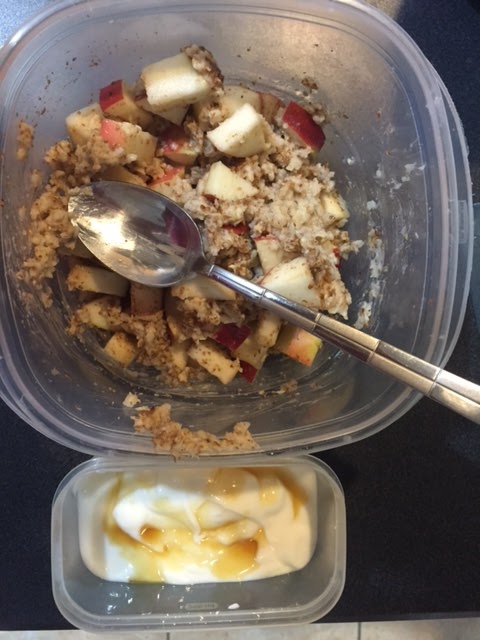
Each week, I did a bit of meal prep on Sundays. It really helped each day during the week go more smoothly when I didn't have as much time in the evenings or following mornings. The main things I prepped were a big batch of brown rice, quinoa, sometimes lentils, and of course some type of mason jar salad! I'm not a big fan of cutting up my veggies or fruit the weekend before because it get's soggy or brown in the fridge. So I leave those for each day or at most, the night before.

I honestly can say that it was very easy to follow the meal plan. There were only two things I tried that I did not care for (miso soup...I think because I added too much seaweed...and roasted fennel bulb). Everything else was delicious! I also ate and prepared so many new things during this. Acorn squash, tahini, bok choy, homemade dressings, etc. I also learned to enjoy cooking! Score!

Did I miss anything during the UR? Of course! But it honestly wasn't like I craved anything. I can't wait to eat peanut butter again, but it's not like I was waiting until the clock struck midnight on Day 21 to have a scoop. I woke up this morning on Day 22 and didn't touch it. I will probably have a small scoop tomorrow morning before my run just for energy/endurance. I can truly say that I really don't miss meat. Having said that, I will go back to it as a source of lean protein for running and also for more variety.

I think the hardest part of the program was being put into situations that tested my willpower and not having the option of a cheat meal here or there. For instance, this weekend watching my son and boyfriend (and friends) eat pizza and hamburgers was difficult. Going to a Mexican restaurant with chips, salsa, and margaritas with sole sisters was rough. Not being able to go out to eat on a date or to relax was hard. But, those are all manageable activities to get through!

The biggest benefit of the entire program was one I had never even considered. For the past 6 months to a year, I have been struggling with daily headaches. I've never had a migraine, but on most days, I would wake up with a headache and go to bed with one. On really bad days, I would probably take 15-20 Advil. I have not had a single headache in 14 days. THAT'S HUGE!!! Had I known this could have been an outcome, I would have done this program 6 months ago in a heartbeat! My plan is to introduce foods back into my diet very very slowly, to try and understand the triggers. I maintained my mileage with running while doing UR (85 miles total in 21 days), so I don't have to worry about slowly introducing exercise back.

Some other physical benefits that I realized are:
*8.8 pounds of weight loss
*Sleeping better than I ever have
*Increase energy in the afternoon/evening
*Overall well being - it's hard to put this one into words, I just feel healthier and stronger than I ever have


Would I recommend the Ultimate Reset?! What do you think??!! If you have any questions about the program or would like more information, send me an email or comment below!

Friday, June 26, 2015

Miso Sesame Ginger Dressing...AMAZING!!!

I'm currently on day 18 of the Ultimate Reset. It has been amazing so far and I'll have a complete wrap up on Day 22 complete with results! But....I must share with you the most amazing thing I've had so far - it's a Miso Sesame Ginger Dressing. So so so so so good. Put it on your favorite salad, in a mason jar, or just use it as a dip for fresh veggies! It's also great on rice or quinoa to give extra flavor!

Ingredients (this makes about 4 servings - perfect to make 4 mason jars at a time!):
1 Tbsp Miso Paste (organic is best)
1/8 C rice vinegar
1/2 Tbsp Bragg Liquid Aminos
1/8 C sesame oil
1/2 tsp chopped or ground ginger
1/8 C water

Microgreen Salad (see previous blog post) with Miso Sesame Ginger Dressing

Get ready for the easy part....just mix it all together. If you have a food processor, you can add all the ingredients in that and blend until smooth. I don't have one, so I mix everything together except for the water, whisk until the miso paste is dissolved, and then add the water. Takes about 5 minutes total! So easy and so tasty! Did I also mention healthy?? No added sugars or extra salt like in many store bought dressings. Definitely worth trying!!

If you don't have miso paste, I got some at the Eastside Asian Market on Colonial (if you're local to Orlando). Whole Foods, Trader Joes, or Fresh Market are great places to go as well. My Publix does not carry it. Bragg Liquid Aminos is an all natural alternative to soy sauce and can be purchased at most grocery stores, including Publix. It's in the dressing aisle.

Wednesday, June 17, 2015

Ultimate Reset Microgreen Salad Mason Jars

As I'm sure you know by now, I'm currently doing the Ultimate Reset. If you don't know, where have you been or where are you hiding?? One of the biggest commitments with the Ultimate Reset is meal planning and prep. So anything I can do to help with less meal prep is great! Well, as you also know, I'm a HUGE fan of mason jar salads. That's where this post comes in.

The first week on the Reset, I made a salad for myself almost every night, either for lunch or dinner. It wasn't until the end of the week that I thought, well this is dumb, why not make it all at once and then I can just grab and go! So for week 2, that's exactly what I did.

This is a very simple recipe and salad, but very filling and delicious. Especially with the dressing. You can also add in any other veggies that you enjoy and top with whatever protein you like - chicken would be perfect! You can also top with toasted seeds or nuts (pumpkin seeds, sunflower seeds, pine nuts, etc).

Best part - without the toppings, these are ULTIMATE RESET APPROVED!!!

Finished Mason Jar Salads
Here are the salad ingredients. This is enough for 4 16oz mason jars.

1 bag mixed greens
1 C shredded carrots (I cut mine into match stick sized pieces)
1 C chopped cucumber
1 C chopped red pepper (I used yellow)
1 C sprouts (I did not include these in mine)
1 C chopped tomato (I used cherry tomatoes because they last longer in the mason jar)
1 C jicama (again, I did not include this)
Fresh herbs of your choice (basil, cilantro, dill, etc)

And the dressing ingredients:
1/4 C extra virgin olive oil
1/8 C red wine vinegar
2 T balsamic vinegar (if desired)
1/2 tsp Himalayan salt (to taste)
1/2 tsp Ground pepper (to taste)
1/2 tsp honey, agave, or pure maple syrup (I used syrup)
1 T fresh lemon juice
1 tsp fresh herbs of your choice (basil, cilantro, dill, etc)

To make, I combined all of the dressing ingredients in a small bowl and whisked together. Then I poured the dressing evenly over the bottom of the four mason jars. Then you add in the vegetables in layers as follows: red pepper, carrots, cucumber, tomatoes, sprouts (if added), jicama (if added), and fresh herbs. Top with the mixed greens to fill as much as possible. Screw on the tops and store in the fridge for up to 5 days. When you're ready to eat, shake it up, pour it out, and ENJOY!

Did I mention how easy and yummy these are?

Ready to Enjoy!!

Monday, June 15, 2015

Ultimate Reset Week 1 Review

It's been a few weeks since my last blog post - things have been a bit busy! This post will be focused on a recap of my first week on the Ultimate Reset!

For those of you who don't know what the Reset is, here are a few short statements from the Team Beachbody site:


"In just three weeks, you'll steer your body from mere survival back to a state of "thrival." In just 21 days, you'll take back your power. Bolster your health. Release what no longer serves you—and never did. Learn. Cleanse. And if you're not already, you'll become 100 percent in awe of the remarkable creation that you are."
However, it is NOT designed to leave you in the bathroom 24/7! In fact, in the first week, I've kept my normal bathroom schedule (sorry if TMI!). 
So why did I choose to do the Reset? Well, I gained a few pounds on my last headache medication. I have been really struggling to get those off. I also felt like I was eating the same foods day in and day out without really branching out and trying new. Finally, I wanted to make sure I was in the best shape and health when we start training for the Chicago Marathon on June 23!
As a summary, the first week has been amazing. I struggled a bit with being achy all over and feeling like I had the flu during a few evenings in the middle of the week, but outside of that I've felt great. The food is very very good AND as an added bonus, I've lost 3.8 pounds and my pants are looser.
Now for the recap - during week 1 there are 4 different supplements you take. Mineralize is taken 4 times a day mixed with water, Optimize is taken 3 times a day in capsule form, Alkalinize is taken once a day mixed with water, and Soothe is taken once a day in capsule form. The capsules and Mineralize are easy to get donw. The Alkalinize is a bit rough. It's a whole bunch of grass powders that you mix in with water. If you've ever had a wheatgrass shot, it's about 3 times the quantity and no where near as sweet. Still not absolutely terrible though.
The food has been nothing short of awesome. Here was my meal plan for the week.


Here were my favorite breakfast, lunch, and dinners for the week.
Breakfast - Oatmeal with Apples & Flax Seed and Organic Greek Yogurt sweetened with pure maple syrup
Lunch - Quinoa Salad with cucumbers and tomatoes
Dinner - Nori Rolls with Tempeh, carrots, cucumbers, avacado, and quinoa (my rolls fell apart, but the insides were delicious)
My least favorite meal was the miso soup. The soup itself was good, but I think I may have added too much seaweed, which took over the taste of the dish. I'm making a hearty vegetable miso soup in week 2, so I'm going to go easy on the seaweed and see how it turns out.
I'm really excited for week 2. I've been very pleased with the amount of energy I have and the fact that I haven't been overly hungry at all. I've still been able to keep up with most of my running (although at a bit slower pace), but I have cut back significantly on the cross training. Bring on more yummy meals!
If you have any questions on the Ultimate Reset or would like anymore information about it, send me an email (fitmindfitmama@yahoo.com) or comment below!

Monday, June 1, 2015

Asian Mandarin Chicken Mason Jar Salad

My latest mason jar salad experiment is an Asian Mandarin Chicken Salad. It definitely wasn't as good as the peanut sauce and soba noodle salad or the taco salad, but I'll still keep this one in my rotation. I may try it with the peanut sauce next time around. I think that'll make a huge difference! It was really good, just not amazing! I guess the bar has been set way high! This was also a lot more work and clean up than the others required....

This one will make 5 16oz mason jars. Adjust quantities as desired.

Ingredients for Dressing (Asian Vinaigrette):
3/4 cup rice wine vinegar
2 Tbsp Braggs Amino Acids (you can also use soy sauce)
1 Tbsp lime juice
1 tsp grated ginger
1 Tbsp hot Chinese mustard
1 Tbsp chopped cilantro
1/2 cup EVOO

Ingredients for the salad:
1/4 package rice stick noodles
1 lb boneless, skinless chicken breasts
1 Tbsp EVOO
2 cans mandarin oranges (I bought the no sugar added ones)
1/2 cup sliced or slivered almonds
2 Tbsp black sesame seeds
Romaine lettuce, shredded or chopped

Finished Salads!

I started by seasoning the chicken with garlic powder, salt, and pepper. I also added a few tablespoons of Braggs Amino Acids (again, could use soy sauce). I cooked the chicken at 350* for 20 min covered and 10 min uncovered. Meanwhile, I cooked the rice stick noodles according to the package to make them soft. Once the rice stick noodles were cooked, I drained and placed them on some paper towel to dry off a bit. I did the same thing with the mandarin oranges - drained and patted dry with paper towel.

While the noodles and chicken were cooking, I combined all the ingredients into a small bowl for the dressing. Once it was all whisked together, I evenly spread the dressing at the bottom of the 5 mason jars.

Next, I added the sesame seeds to a frying pan with the tablespoon of EVOO on medium heat for about 5 minutes. Once the chicken was chopped into small pieces, I added the chicken to the pan and tossed to coat the pieces in the seeds. At the same time in a separate pan, I toasted the almonds.

All that's left was to layer. With the dressing on the bottom, I added the cooked rice sticks. This helps them soak up the dressing and have more flavor. Next I added the chicken, then the mandarin oranges, then the almonds, and finally the lettuce.

These can be stored up to 5 days in the fridge. When you are ready to enjoy, just shake up and pour onto a plate or into a bowl. Super easy and tasty! Like I said earlier, next time I may try it with peanut sauce. I also would add more veggies (carrots? red/green/yellow peppers? cucumbers?). Still very tasty, just worth playing around with a bit!

 Lunch time!!

Wednesday, May 27, 2015

Mason Jar Salad - Asian Salad

Mason Jar Salad - Asian Salad

I did this one a few weeks ago and didn't post a recipe. But it is a winner for sure!!! So good and so filling. I can't wait to make it again. I definitely recommend giving this one a try.

When I made it, I didn't have all of the ingredients for the dressing, so I used a store bought low sodium spicy peanut dressing. My only change next time will be to actually make the dressing at home. One so it's healthier and also so I can make it less spicy! The ingrediant I was missing was sambal oelek, but I found out after the fact that it is a type of chili paste. Since I don't like much spice, I may go without or use a pinch of chili powder instead the next time around.

Finished Jars

This recipe is for 4 16oz mason jars. Adjust quantities as needed.

Ingredients for the Dressing:
-2 Tbsp peanut butter
-4 tsp sambal oelek
-4 tsp rice vinegar
-4 tsp soy sauce
-1/4 cup EVOO
-1 Tbsp black sesame seeds

Ingredients for the Salad:
-4 oz soba noodles
-1 bell pepper, thinly sliced
-1 cup shelled edamame, cooked
-2 large carrots, shredded (and peeled if you prefer)
-4 green onions, thinly sliced
-1/2 cup crunchy rice noodles

To start, cook the noodles and edamame according to the directions on the package. I ended up buying dried edamame and reconstituting it in a pot of boiling water. I couldn't taste the difference, but fresh would be healthier. While those are cooking, stir together all of the dressing ingredients in a small bowl.

Divide the dressing equally between the 4 mason jars. Divide the cooked doodles evenly and add on top of the dressing. Layer the remaining ingredients in order. When I make this again, I will leave the rice noodles out and add the day I enjoy the salad to keep them crisp. They were still good in the jars, but did not add any crunch to the salad.

To add protein, you could add 3-4 oz of grilled steak or pork on top of the finished salad!


Ready to eat!


Sunday, May 24, 2015

Mason Jar Salad - Taco Salad

Oh my! This is a mason jar salad you do NOT want to miss. Amazing!! So easy and tastes fantastic. And have I mentioned how much I love mason jar salads? They save great and it's so nice to have lunches for the week that don't require prep every morning! Oh, not to mention this stuff is healthy! Tastes great + healthy = score!!

Finished Taco Salad

This recipe will make 4 16oz mason jar salads. Adjust the quantities if you are making different sizes.

Dressing:
5 Tbsp lime juice
2 tsp honey
2 Tbsp EVOO
1-2 tsp ground cumin
1 tsp sea salt

Salad:
1 cup black beans (drained and rinsed)
1/2 cup diced bell pepper (I used yellow and orange)
1/2 cup sliced green onions
1 cup cooked quinoa
1 small avocado, diced (use lime juice to reduce browning)
4 Tbsp salsa
Sliced lettuce to fill

To start, get the quinoa cooking as it takes the longest. Next, whisk all of the dressing ingredients together. Taste and adjust the salt, cumin, and honey levels to your desire. Pour evenly in the bottom of the 4 jars.

Then all that's left is to chop up all the ingredients and layer in the jar in the order they are listed above (black beans, diced peppers, green onions, quinoa, avocado, salsa, and top with lettuce). After I rinsed the black beans, I patted them dry with paper towel. I did the same thing with the quinoa.

Then store in the fridge for up to 5 days. Did I already mention how easy these were? I do plan to make some shredded chicken this week to top the salad with.When you're ready to eat, shake the jar and pour onto a plate. You can also top with sour cream (I used low fat) or cheese. Enjoy!

So good!!


Friday, May 22, 2015

Stir Fried Veggies - Amazing and Easy!!

I have recently fallen in love with stir fried veggies. I originally found a recipe that is on the 21 Day Ultimate Reset, however, there are so many options this never gets old!

Last night I had stir fried veggies with brown rice and turkey kielbasa. Earlier in the week, I had stir fried veggies with soba noodles. I also made stir fried veggies with roasted turkey. You get my point, the possibilities are endless.

Veggies with Soba Noodles

So where to start? Pick whatever veggies you want to make. My favorites are red, green, or yellow peppers, carrots, and broccoli. I also want to experiment with squash and asparagus. I've used zucchini before as well. But there are so many more you can throw in too. Sugar snap peas are another one that come to mind! If you want to add rice or noodles, brown rice is my favorite and healthy. Quinoa would also be a good choice! Then if you want a protein, the sky is the limit. Turkey, chicken, steak, pork, really anything!

Here is my recipe from last night:

2 tsp extra virgin olive oil
2 tsp sesame oil (add a bit more oil if you are going to increase the amount of veggies!)
3/4c broccoli florets
2 medium sized carrots, cut into 2in pieces and cut into 1/3rds
1 bell pepper (I used 1/2 yellow and 1/2 red)
1/2c brown rice, cooked
2oz turkey kielbasa
2 Tbsp reduced sodium soy sauce

To start, heat both oils in a large skillet. While those are heating, get the rice cooking. I use minute rice so that it's quicker. The veggies take less than 10 minutes to make. If your rice takes longer, get that started first. Once hot, add the carrots for a minute or two and stir frequently. Then add the broccoli and peppers. Cook for about 3-4 minutes, again stirring frequently. Add the protein, in this case the kielbasa, at the end to warm. Remove from heat, add 1 tablespoon of soy sauce and stir. I add the other tablespoon of the soy sauce to the rice. Then, combine on a plate and ENJOY! See how easy that is? And trust me, it's amazing!

Finished Product in Skillet


Monday, May 18, 2015

Mason Jar Sprout Salad Recipe

I LOVE mason jar salad recipes. They are so easy to make, stay fresh in the fridge for up to five day, and taste fantastic! This recipe was no different.

Finished Product!

First off, the recipe I started with is as follows. This is portioned to make 4 16oz mason jar salads.

Basil Vinaigrette Dressing:
*10 Tbsp olive oil (I used EVOO)
*5 Tbsp red wine vinegar
*8-12 fresh basil leaves, chopped
*2 heaping tsp sweet Dijon mustard
*Salt and pepper, to taste

For the Salad:
*1c cooked chickpeas
*1/2c grated carrots
*1c cherry tomatoes (leave intact to preserve freshness)
*1c shelled edamame beans
*1/2c pine nuts, or your preference of nut (I used sliced almonds...pine nuts are pricey!)
*1c fresh sprouts (I used alfalfa and snack sprouts)

I started by cooking the chickpeas as directed on the package. I also had to cook the edamame beans, since the only ones I could find shelled were dried. So I boiled them in some water for a few minutes to reconstitute them.

While those were boiling, I made the basil vinaigrette dressing. I added all of the ingredients into a Tupperware bowl and shook them up. I didn't have any sweet Dijon mustard, so I mixed regular Dijon and honey mustard together. It tasted good, so I went with it.

Once the chickpeas were done, I rinsed and drained them and added them to the dressing. I shook up the mix once again. Then portioned the dressing and chickpeas evenly into each of the jars. I will say that the dressing could be cut in half. There was WAY too much dressing on the salad. A little bit of EVOO goes a long way!

All that's left is to layer the remaining ingredients. The order from top to bottom that I used: cherry tomatoes, carrots, edemame, sliced almonds, snack sprouts, and alfalfa sprouts). The idea is to layer heaviest on the bottom and lightest on top.

You can store them in the fridge for up to 5 days and when you're ready to enjoy, just shake and pour onto a plate or bowl! It's so easy!

Edit: with the reduced amount of dressing (which made it so much better!), this recipe per serving is 391 calories, 32g of carbs, 24g of fat, and 13g of protein. I may add extra protein (shredded chicken or turkey) to it!

Ready to enjoy!